
Ever wondered how to make a Chrome extension? It’s easier than you might think.
You can easily create an extension that customizes users’ browsing experience worldwide with just a little coding knowledge.
In this blog post, we’re going to show you how to make a Chrome extension. By the end of this post, you’ll be on your way to making the Internet a better place!
What Is a Chrome Extension?
Chrome extensions are small, easy-to-use programs that can modify and enhance the functionality of the Google Chrome web browser.
Because they are so popular, there are extensions for various purposes. This ranges from simple things like website blockers to more complex tools like security and privacy.
Key Concepts of Developing a Chrome Extension
To create a Chrome extension, you’ll need to know the basics of HTML, CSS, and JavaScript. You’ll also need to be familiar with Chrome’s extension APIs.
Extensions are made using the same web technologies used to make web apps. This means you need to use HTML for content markup, CSS for styling, and JavaScript for scripting and logic.
Extension APIs
Chrome’s extension APIs provide extensions with access to a variety of features and functionality.
This includes changing the behavior or appearance of websites, collecting and organizing information across websites, and adding features to Chrome DevTools.
Files
1. Manifest.json
Extensions must have a manifest.json file to function. This file contains all the information about an extension.
It includes the extension’s name, version, description, and URLs for the icons and screenshots.
The file can also include other information, such as what permissions the extension needs and which pages it should be activated on.
2. Service worker
The service worker is integral to extensions because it handles and listens for browser events. It can cache files, handle background messages, and more.
3. Content scripts
Content scripts are another vital part of extensions. They execute Javascript in the context of a web page, allowing them to interact with the content.
For example, they can read or modify the Document Object Model (DOM) or inject new content into the page.
4. Designing
When designing your extension, it’s essential to choose which features to support. Make sure your extension is functional and meets your users’ needs.
How to Create a Chrome Extension
Step 1: Creating the project
Creating a Chrome extension is easier than it might sound.
To illustrate, we’ll quickly take you through building a simple extension that will allow you to visit the Symalite blog and do a random search based on the categories found on the site.
The extension will have a toolbar button that, when clicked, will take you to a random Symalite article.
Here are the things our search tool can do:
- Find articles
- Browse specific categories
- Work with arrays and variables
Step 2: Creating the files
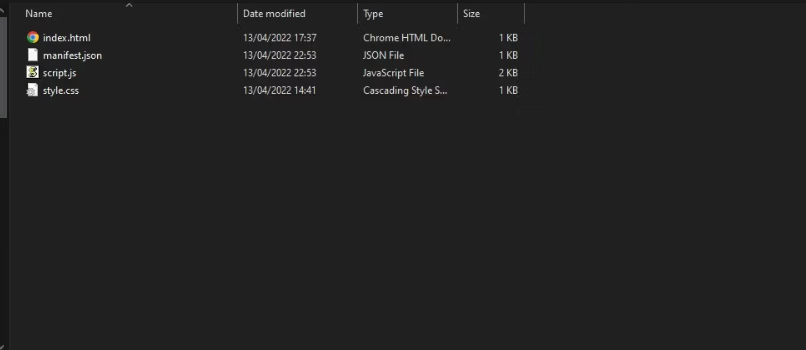
Now that we have the basics of our project set up, we need to create a file folder.
For creating the files, we can store the file on our computer. For the process, we need to make four different files: an HTML file, a CSS file, a JavaScript file, and a JSON file.
The manifest.json file is the primary file that contains all the information about our extension.
This is where we specify the name of our extension, the version, and the Chrome API it uses.
It should also include other pertinent information like what icons to use and what pages to open when a user clicks on our Browser Action.
The icon for our extension can be any PNG file with a size of 19×19 px. We’ll put this icon in the same folder as our manifest.json file.
The HTML page for our popup will be in a file called popup.html. This page will contain basic HTML and JavaScript code to show a popup when users click on our Browser Action.
We’ll also create a file called popup.js which will contain the JavaScript code for our popup. This code will run when a user clicks on our Browser Action, allowing us to show or hide the popup and display different content.
Now that we’ve created our files, we can test our extension in Chrome. Open up Chrome and go to chrome://extensions.
You’ll see a list of all the extensions that are installed in Chrome. Click “Unpacked Load extension” and select your files’ folder.
Your extension will be loaded and visible in the extensions list.
Step 3: Building the manifest file
A JSON (JavaScript Object Notation) file, the manifest file contains information about your extension, including its name, version number, description, and what files to load upon installation.
For our extension, we want it to be able to access all websites, so we include “HTTP://*/*” as our permission.
The action section of the manifest tells Chrome what to do when the extension is installed. In this case, we want Chrome to load index.html as the popup for our extension.
{
“name”: “symalite.com Automated Search”,
“version”: “1.0.0”,
“description”: “A search tool to find articles”,
“manifest_version”: 3,
“author”: “Imran”,
“permissions”: [“storage”, “declarativeContent”, “activeTab”, “scripting”],
“host_permissions”: [“”],
“action” :{
“default_popup”: “index.html”,
“default_title”: “SYS Auto Search”
}
}
Building the HTML & CSS
The HTML for our extension is fairly simple. We have two buttons, one that takes you to blog.symalite.com and one that we will use as a trigger for our script. We also have an h1 tag that we will use to display information about our extension.
<html>
<head>
<title>SYS Auto Search</title>
<meta charset=”utf-8″>
<link rel=”stylesheet” href=”style.css”>
</head>
<body>
<h1>SYS Auto Search</h1>
<a href=”https://blog.symalite.com/” target=”_blank”><button id=”buttonOne”>Go to Symalite </button></a>
<button id=”buttonTwo”>Start Search</button>
</body>
<script src=”script.js”></script>
</html>
The CSS for our extension is very simple. We need to style the h1 tag and the two buttons. Our style.css file looks like this.
We’ll change the color of the HTML and body tags to black and the padding and margin of all four tags to 10px. We’ll also give the h1 tag a font size of 10 px and make it bold.
For our buttons, we’ll change their color to green and increase their width to 300px. We’ll also give them some padding and margin to look nice and neat.
HTML {
width: 300px;
}
body {
font-family: Helvetica, sans-serif;
}
h1 {
text-align: center;
}
#buttonOne {
border-radius: 0px;
width: 100%;
padding: 10px 0px;
}
#buttonTwo {
border-radius: 0px;
width: 100%;
padding: 10px 0px;
margin-top: 10px;
}
Building the JavaScript
To do this, we’ll need to use some JavaScript. If you’re not a JavaScript programmer, no problem. We’ll show you everything you need to know.
The final function in our script, called autoSearch(), is the primary function that will find and return results for us.
This function takes two parameters: the keyword we want to search for and the number of results we want to see. It then uses the jQuery library to make an AJAX call to the Symalite website.
This call returns a list of results, which our function filters and sorts before returning them to the user.
// This special function inserts our autoSearch function into the page’s code
function insertScript() {
// This only selects the focused tab for the operation and passes the autoSearch function
chrome.tabs.query({active: true, currentWindow: true}, tabs => {
chrome.scripting.executeScript({target: {tabId: tabs[0].id}, function: autoSearch})
})
// This closes the entire extension popup to select the website search bar
window.close();
}
// This is an event listener that detects clicks on our “Start Search” button
document.getElementById(‘buttonTwo’).addEventListener(‘click’, insertScript)
// This function selects a random topic from an array and
function autoSearch() {
// This is an array to store our search terms
const searchTerms = [“micro-saas, “chrome-extensions”, “marketing”, “startup-studio”, “learn”, “how-tos”, “best-of”, “reviews”,];
// This generates a random number between 0 and 19
let selectorNumber = Math.floor(Math.random() * 20);
// This section uses the random number to select an entry from the array
let selection = searchTerms[selectorNumber];
// This simulates a click on the MUO website search icon
document.getElementById(“js-search”).click();
// This sets the symalite website search bar as a variable
var searchBar = document.getElementById(“js-search-input”);
// This inserts our random search term into the search bar
searchBar.value = searchBar.value + selection;
// This finishes the process by activating the website form
document.getElementById(“searchform2”).submit();
Step 4: Loading your extension into Chrome and check for errors
If you followed the previous steps perfectly, your extension directory should now be loaded into Chrome.
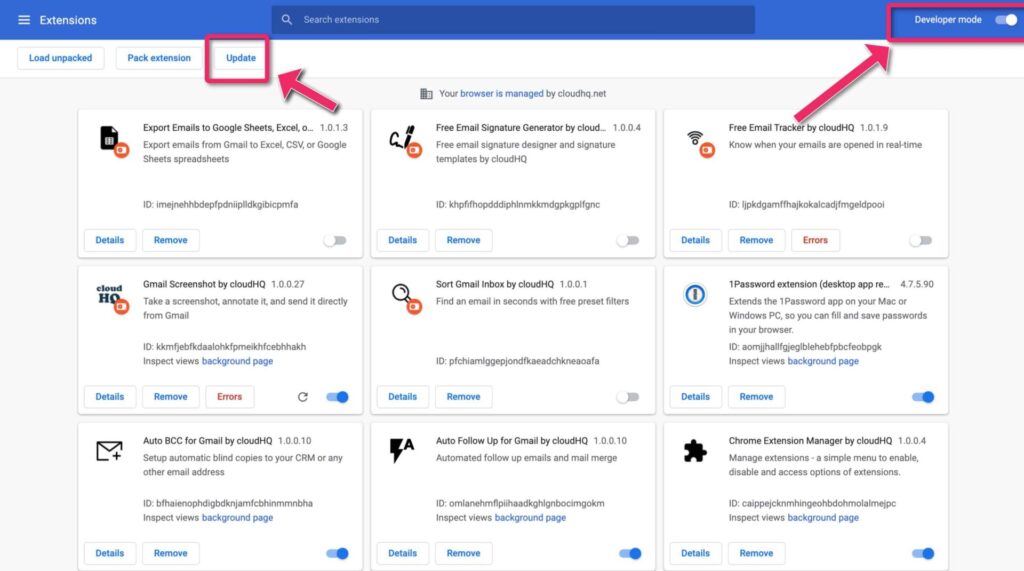
You can now test your extension by going to chrome://extensions and clicking “Developer mode” in the top right-hand corner.

Next, click “Load unpacked” and select your extension directory.
If you’ve set everything up correctly, you should see your extension’s icon in the list of extensions and be able to use it in Chrome.
After that, check your extension. If it loads perfectly, then it’s all okay.
On the other hand, if there are any errors, Chrome will display them at the top of the page.
If this is the case, look for errors and correct them before loading your extension again.
Step 5: Adding your files to Chrome://extensions
The Chrome extensions page is where you manage your installed extensions. To add your extension, open Chrome and go to chrome://extensions.

Make sure that the slider in the top right corner saying “Developer Mode” is set to “on.”
Now, enter the load unpacked option and find the exact folder where you saved your extension files. Afterward, click the folder.
Now, you can click the puzzle piece icon in the top-right corner of the chrome extensions page to pin your extension to the main taskbar.
You should now be able to access your extension by clicking the three-dot icon in the top-right corner of Chrome and selecting More Tools > Extensions.
Step 6: Creating your user interface
To create a user interface for your extension, you need to declare a popup.html file within your manifest. This file will be used as the default user interface for your extension.
You can design your user interface however you like, but it’s recommended that you keep it simple and concise. Make sure that all of your content is easy to read and navigate.
Making the user interface appear when we click on our Browser Action is vital.
To that end, our user interface will consist of a specific text labeled and a button that the user may click to analyze the current page.
Step 7: Adding in some logic
Including logic in your extension scripts can help make your user interactions more meaningful and efficient.
For example, if you want to disable a button after it has been clicked once, you can use logic. In the popup.js script, you would include the following code:
if (event.button === 1) { //disable the button }
This code will check to see if the button was clicked once (by checking the event.button variable). If it were, it would disable the button using the jQuery disable() function.
Step 8: Implementing the logic
When the user clicks the “Check this page now!” button, we want to open a new tab and run the test against the current page.
To do this, we’ll use an event listener to add functionality to our extension.
We can include logic within any user interface elements we create. In this case, open a new tab when the button is clicked.
We can use the URL from the current page to specify which page to run the test against.
Step 9: Testing your extension
Testing is essential for any extension, whether a new one or an existing one. Make sure to test your extension before releasing it to the public to ensure that everything works properly.
Another option is to test it yourself or have someone else test it. If you want someone else’s help, make sure they can figure it out themselves.
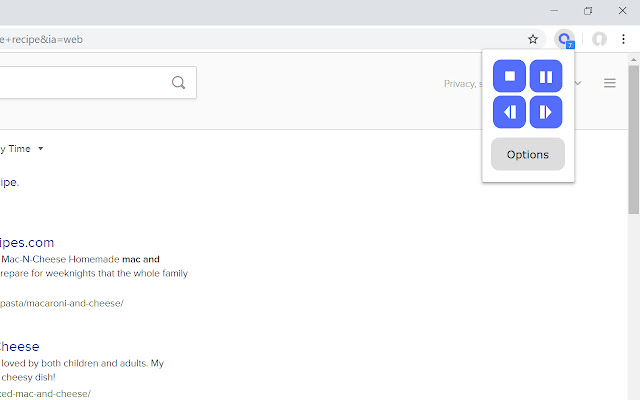
Once you’re happy with your extension’s appearance and functionality, publish it so others can use it.
For our extension, for example, here’s how it looks like:
Step 10: Publishing in the Chrome Web Store
Before publishing the extension, you must choose the type of extension you want to publish: public, unlisted, or private.
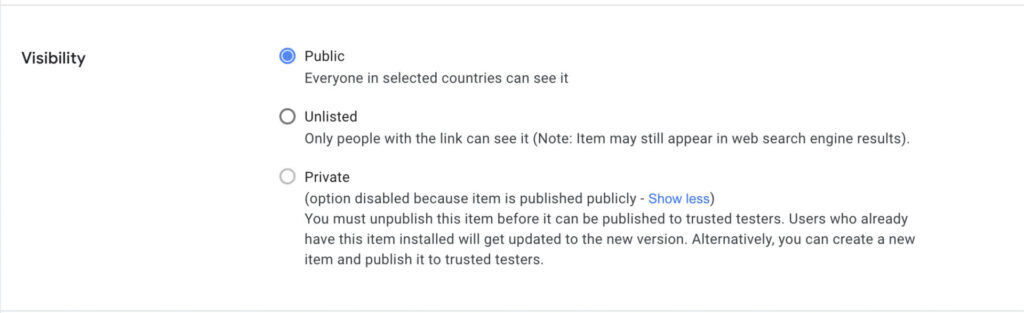
1. Public
When you make an app or extension public, it’s visible to anyone who visits the Chrome Web Store.
2. Unlisted
When you make an app or extension unlisted, it’s only visible to users with the link to it. It doesn’t show up in the Chrome Web Store search results, but you can share the link with others.
3. Private
When you make an app or extension private, it’s only visible to users in your domain. You can also restrict it to trusted testers that you specify in your developer dashboard.
Can I Practice Making a Chrome Extension?
Yes, you can certainly practice making a Chrome extension. One good way to do this is to try out samples that are available for free.
Google’s GitHub repository has several samples for Chrome Extensions that you can also use to get a feel for the process.
Another option is to create a repo on GitHub and allow people to clone it. This way, people can access your source code and play around with it without installing your extension.
Of course, if you want to make your extension available to the public, you can always upload it to the Chrome Store.
Extra Resources
- If you want to learn more about making Chrome Extensions, we found these resources to be helpful:
- – The Google Extensions documentation is excellent for getting started and for simple extensions. However, it could cover more advanced features better.
- – Stack Overflow and Quora threads are always helpful for finding answers to specific questions.
- – The Chromium Extensions Google Group is full of knowledgeable people happy to help with extensions-related questions.
Frequently Asked Questions About Google Chrome Extensions
How much does it cost to publish a Chrome extension?
If you’re looking to publish your Chrome extension on the Web Store, you’ll need to pay a $5.00 registration fee.
This fee will give you access to the Chrome Webstore Developer Dashboard, where you can manage your extension and its associated metadata.
Can I create my Chrome extension?
Yes, you can create your Chrome extension. Check out the official Chrome Extensions Developer Guide, or follow our tutorial to get started.
This guide provides a comprehensive overview of extensions and includes instructions on creating and publishing your own extension.
Final Thoughts About Creating Chrome Extensions
Have you ever wished your browser could do more or that you had a custom tool to make your job easier? Creating a Chrome extension may be the perfect project for you.
Not only will you have an exciting new feature to show off to your friends and clients, but you’ll also be improving user experiences on the web. And who knows—your extension might go viral!
We can’t wait to see what kinds of extensions our readers come up with, so get in touch with us and let us know what kind of Chrome extension you plan to make. We are always available if you need help!